How to Strip Wood Veneer
We’ve worked with wood veneer for years, and honestly, stripping veneer still feels like a mix of craft and patience. When done right, you protect the real wood underneath and save furniture pieces from disaster. When done wrong… well, let’s just say we’ve seen tears, cracks, and flying scrapers.
In this guide, we walk you through how to strip wood veneer step by step.
We keep it practical, human, and grounded in real production experience. Along the way, we connect veneer stripping to veneer production, drying process choices, and why uniform drying matters more than people think.
Understanding Wood Veneer First
Before we grab tools, we need to respect what veneer really is. Veneer isn’t fake wood. It’s a thin slice of wood cut from real logs.
What Makes Wood Veneer Unique
Wood veneer comes from many wood species, each with its own mood and grain. Oak fights back. Walnut behaves politely. Birch loves to splinter. Knowing this saves time and nerves.
Veneer sheets usually measure less than 3 mm thick. That slim profile creates beauty but also fragility. One careless move can destroy veneer quality in seconds.

Solid Wood vs Veneer Reality
People often confuse solid wood and veneer. Solid wood furniture uses thick lumber throughout. Veneered furniture uses a solid wood piece or engineered core with a veneer surface on top.
Both have value. We’ve seen high-quality furniture, solid wood designs fail while smart veneer production thrives. The trick lies in respect and skill.
Why Strip Wood Veneer at All?
We strip veneer for many reasons, and none involve boredom. Usually, damage forces our hand.
Common Reasons We Remove Veneer
Bubbles from trapped moisture
Cracks after poor veneer drying
Stains that won’t sand out
Outdated finishes on furniture pieces
Veneer sheets peeling from wet veneer history
Old furniture often hides mistakes from the past. Bad glue. Uneven pressure. A rushed drying process. Stripping gives us a clean slate.
Emotional Side of Restoration
We feel attached to solid wood furniture projects. Some pieces hold memories, not just grain patterns. Stripping veneer feels invasive, but it often saves the soul of the piece.
Tools We Trust for Stripping Veneer
Tools matter more than muscle. We’ve learned this the hard way.
Manual Tools That Give Control
Hand tools keep risk low and precision high. We always start slow.
Putty knife (thin and flexible)
Cabinet scraper
Utility knife with a fresh blade
Heat gun with temperature control
These tools let us read the veneer sheet as we work. We feel resistance before damage happens.
Chemical Helpers (Use Carefully)
Chemical strippers soften glue and finishes. They also test your patience and ventilation.
We recommend:
Citrus-based stripper for indoor work
Solvent-based stripper for stubborn glue
Gloves, goggles, and airflow (non-negotiable)
Chemicals speed things up, but they demand respect.
Step-by-Step: How to Strip Wood Veneer
This part matters most, so we slow down and breathe.
Step 1: Test a Hidden Area
We always test first. A drawer edge or underside works best. This step tells us:
Glue type
Veneer thickness
How wet veneer reacts to heat
Skipping this step invites regret.
Step 2: Apply Heat or Stripper
Heat softens glue without soaking the core. We move the heat gun constantly. One hot spot can scorch the veneer surface.
With the stripper, we spread evenly and wait. Rushing here ruins wood veneer fibers.
Step 3: Lift the Veneer Gently
We slide the scraper under the veneer sheet at a shallow angle. We never pry upward. We glide forward.
If the veneer resists, we stop. Force breaks things. Patience fixes them.
Step 4: Clean the Core Surface
After removal, glue residue remains. We scrape lightly, then sand with fine grit. The surface must stay flat for future veneer production.
At this stage, we finally see the solid wood piece underneath. That moment always feels rewarding.

Mistakes We See Too Often
Even experienced hands slip up. We’ve made these mistakes ourselves.
Overheating the Veneer
Too much heat dries wood too fast. That causes cracks and warping. Uniform drying always beats speed.
Ignoring Moisture Content
Wet veneer behaves differently from dry veneer sheets. Moisture imbalance leads to failure later. We always check moisture before re-veneering.
Rushing the Process
Stripping veneer isn’t fast food. It’s slow cooking. Shortcuts cost more time later.
How Veneer Stripping Connects to Veneer Production
Stripping doesn’t live alone. It links directly to veneer production and drying strategy.
Why Drying Matters After Stripping
Once stripped, the exposed core absorbs air moisture fast. We stabilize it before applying new veneer sheets.
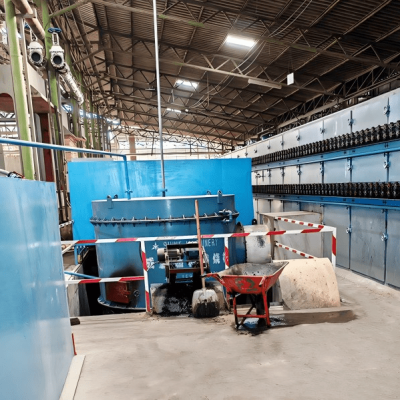
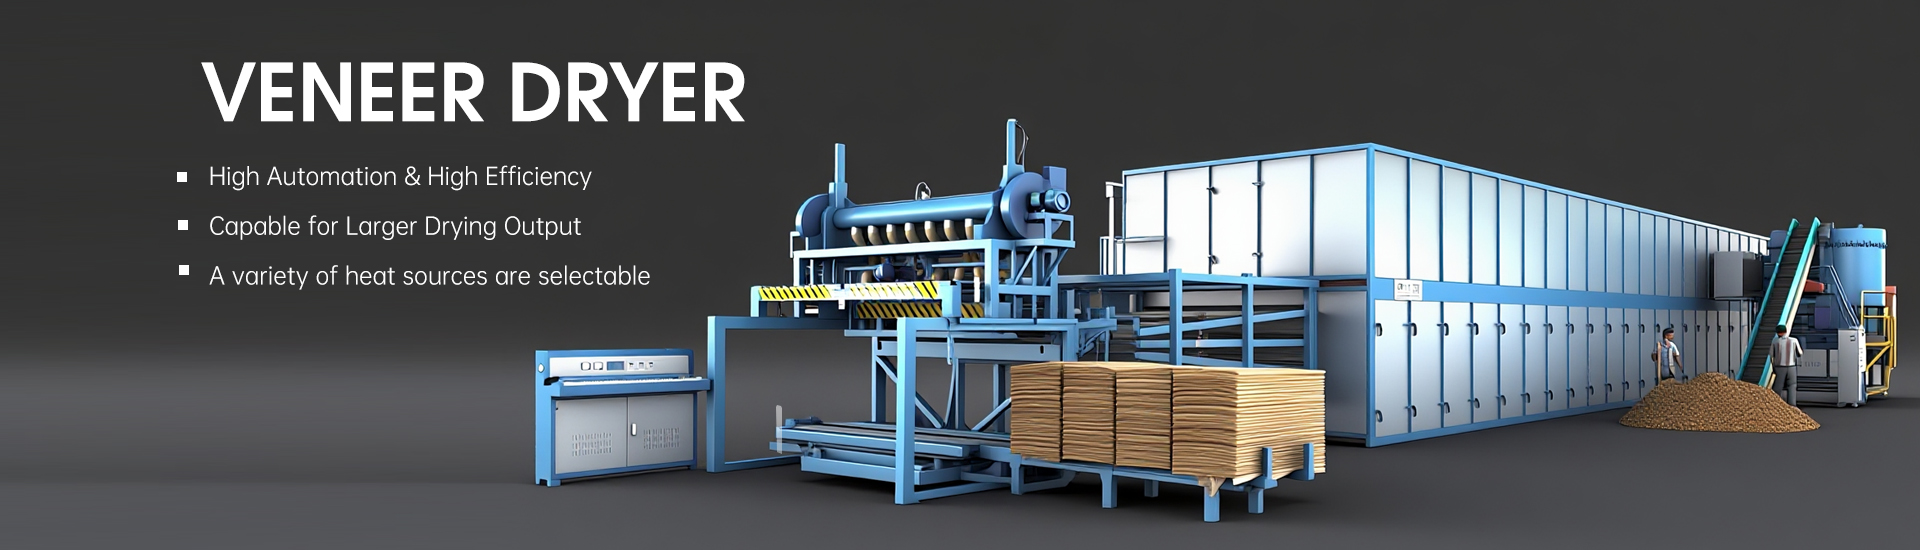
A controlled drying process prevents movement. This is where professional equipment like a Veneer Dryer Machine supports uniform drying and stable veneer quality. We limit its mention because skill still matters more than machines.
From Log to Finished Veneer
In veneer production, we slice logs into thin layers. We then manage veneer drying carefully. Wet veneer enters drying tunnels. Controlled heat exits with balanced moisture.
Stripping teaches respect for this chain. Every step affects the final veneer surface.
Choosing the Right Veneer After Stripping
Replacing veneer demands smart choices, not impulse buys.
Matching Wood Species
We always match wood species to the original design. Grain direction, color tone, and pore size all matter.
A mismatched veneer sheet looks wrong instantly. The eye catches lies faster than flaws.
Checking Veneer Quality
High-quality veneer shows:
Consistent thickness
Clean edges
Even moisture content
No surface cracks
We reject sheets that feel brittle or smell overly dry.
Finishing After Veneer Removal
The final act deserves attention and care.
Surface Prep Comes First
We sand lightly and clean thoroughly. Dust ruins adhesion. Clean wood welcomes glue.
Glue and Pressing Tips
We apply glue evenly. Too much causes bubbles. Too little causes gaps.
We press evenly across the surface. Pressure consistency matters as much as glue choice.
Final Finishing Touches
After curing, we sand and finish slowly. Oil, lacquer, or wax all work when applied with care. The veneer surface tells us when it’s happy.
Our Final Thoughts
Stripping veneer tests patience, skill, and humility. We’ve ruined sheets and learned lessons. Each mistake shaped our respect for wood veneer and the drying process behind it.
When you treat veneer like real wood—because it is real wood—it rewards you. Furniture pieces regain dignity. Solid wood furniture lasts longer. Craft stays honest.
If you strip veneer with care, humor, and steady hands, you’ll win more often than you lose. And trust us, that feeling never gets old.