How Is Wood Veneer Made?
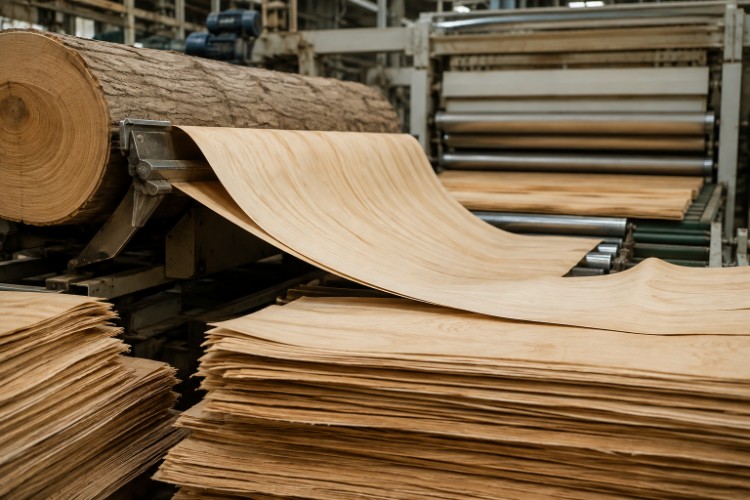
Table of Contents
1. What Is Wood Veneer?
2. Choosing and Preparing the Logs
3. Cutting Wood Into Veneer Sheets
4. The Veneer Drying Process
5. Grading, Clipping, and Stacking
6. From Veneer to the Final Product
7. Why Production Quality Matters
What Is Wood Veneer?
What Is Wood Veneer, exactly? In simple terms, veneer is real wood cut into a thin layer. Manufacturers bond these thin slices to panels, doors, furniture, and other decorative surfaces. Unlike printed laminate, veneer keeps the natural character of the original tree, including grain patterns, color changes, and small marks.
The basic idea sounds simple, but veneer production requires careful control. A log must pass through several stages before it becomes a useful sheet. These stages include log preparation, conditioning, cutting, drying, trimming, grading, and storage. We pay attention to every stage because one small mistake can affect the final product.
Veneer can come from many wood species, including oak, walnut, maple, birch, beech, poplar, and eucalyptus. Each species behaves differently during cutting and drying. Some woods cut smoothly, while others can crack, curl, or develop surface defects. That is why experienced producers never treat every log in exactly the same way.
Veneer also uses wood more efficiently than thick solid wood. One log can produce a large surface area when converted into thin slices. The result combines the appearance of real wood with a stable substrate. It offers a practical choice for furniture, cabinets, doors, walls, and plywood.
Choosing and Preparing the Logs
Selecting the Right Wood Species
Good veneer starts with good logs. We normally consider species, diameter, length, growth characteristics, color, knots, and visible defects. The intended application also matters because a cabinet face needs different visual qualities than structural plywood.
A beautiful log can create beautiful veneer. However, appearance alone does not guarantee production value. The log must also suit the selected slicing method. Grain direction, growth rings, and internal structure all influence the result.
For premium decorative veneer, producers often select logs with attractive grain and consistent color. For plywood, producers may prioritize yield, strength, and uniform thickness. This difference helps explain why the same tree can produce very different commercial products.
Debarking and Conditioning
After selection, workers remove the bark and prepare the logs for processing. Debarking protects cutting equipment and removes dirt from the log surface. Manufacturers then cut logs to suitable lengths for the peeling or slicing equipment.
Many logs also undergo heating, steaming, or hot-water conditioning. This step softens the wood and makes cutting easier. The exact treatment depends on the wood species, log size, and desired veneer quality.
Conditioning also helps reduce cutting defects. A well-prepared log can produce smoother surfaces and fewer splits. In other words, the knife should not have to fight the tree.
Cutting Wood Into Veneer Sheets
Rotary Cutting and Peeling
One major method is rotary cutting. The machine holds the log along its central axis and rotates it against a fixed knife. The knife continuously peels a thin layer from the log, much like unrolling a giant wooden roll.
Rotary cutting creates wide and continuous veneer. It offers high material recovery and works especially well for plywood manufacturing. The resulting grain can look broad, flowing, and sometimes quite dramatic.
This method also works efficiently for large-scale veneer production. Continuous sheets move quickly from the cutting area toward clipping and drying. That steady flow makes rotary peeling popular in industrial plants.
Slicing and Rift Cut Veneer
Another approach uses slicing instead of full-log peeling. The producer cuts the log or flitch across a knife to create individual thin slices. This method gives the operator greater control over grain appearance.
Different cutting directions create different visual effects. Plain slicing can produce familiar cathedral patterns. Quarter slicing can create straighter grain, while a rift cut often produces a more linear appearance.
The slicing method therefore becomes a design decision, not just a production decision. Designers may choose a specific cut to create a certain grain pattern. The same species can look surprisingly different after different cuts.
Why Thickness Control Matters
Veneer thickness affects both appearance and performance. Commercial decorative veneer often uses very thin material, while structural applications may require thicker sheets. The cutting equipment must maintain consistent thickness across the sheet.
Blade condition matters too. A poorly adjusted knife can create uneven surfaces, loose fibers, and thickness variation. Modern production therefore pays close attention to knife settings and mechanical stability.
At this point, the green veneer still contains considerable water. The sheets also remain vulnerable to curling and cracking. The next stage becomes critical: veneer drying.
The Veneer Drying Process
Why Fresh Veneer Needs Drying
Freshly cut veneer contains a high moisture content. If producers store it without proper drying, the sheets may warp, stain, crack, or develop mold. Excess moisture can also interfere with later gluing and pressing operations.
The drying process removes excess water while protecting the structure of the wood. That sounds easy until you remember one thing. Wood is a natural material, and it does not always behave politely.
The producer must balance temperature, air movement, drying time, and veneer thickness. Different wood species also need different drying conditions. The goal is not simply to make the veneer dry. The goal is to make it stable and usable.
How a Wood Veneer Dryer Works
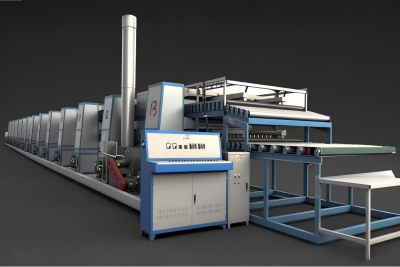
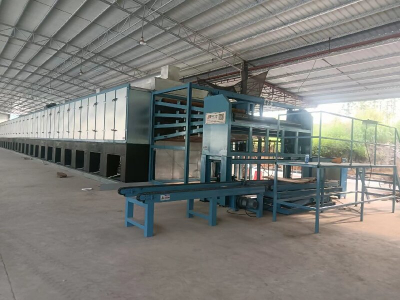
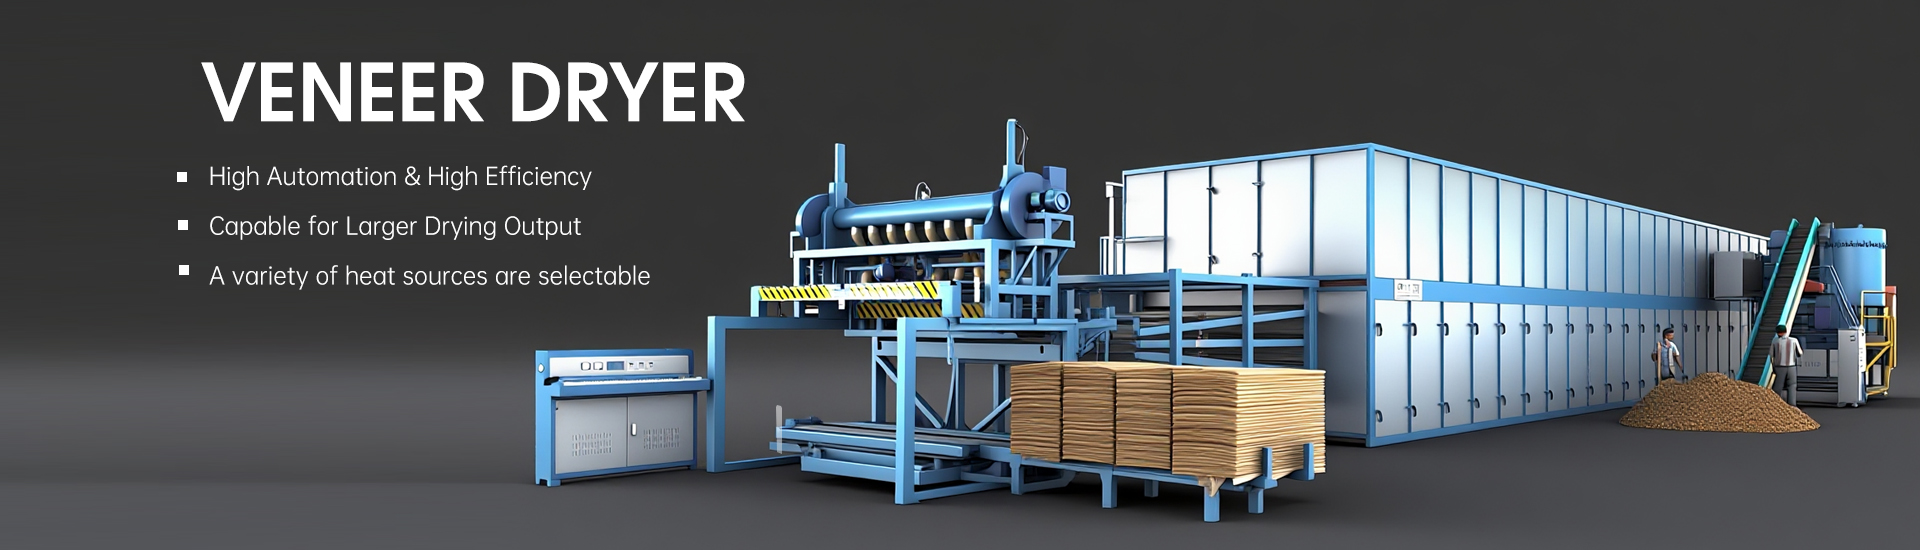
A modern wood veneer dryer moves wet sheets through a controlled hot-air environment. Rollers, belts, or screens transport the sheets while heated air removes moisture. The system can also help flatten the veneer during drying.
The operating conditions depend on the material. Thin sheets usually require careful handling because they can curl or buckle easily. Thicker sheets need enough heat and airflow to remove moisture without creating excessive internal stress.
A properly designed Veneer Dryer Machine should provide stable airflow and consistent drying conditions. We focus heavily on uniformity because uneven drying can create quality differences across the same batch. Good drying equipment turns a fragile green sheet into a stable industrial material.
The target moisture level depends on the application, species, climate, and downstream process. Some plywood production systems commonly dry veneer into a low single-digit moisture range. Decorative veneer producers may use different targets based on the substrate and finishing requirements.
Why Moisture Control Is So Important
Moisture control directly affects veneer quality. Too much moisture can cause bonding problems and biological damage. Excessive drying can make veneer brittle and increase the risk of cracks.
We therefore treat moisture measurement as a core quality step. Operators can use moisture meters to check sheets after drying. If the readings fall outside the required range, producers can adjust the process before the material moves forward.
This approach saves time and material. It also reduces the chance that defective veneer reaches the final production stage. A few minutes of careful checking can prevent hours of expensive rework.
Grading, Clipping, and Stacking
Trimming and Defect Removal
After drying, producers inspect the veneer sheets. They look for splits, holes, knots, discoloration, uneven edges, and other defects. Workers or automated systems then trim damaged sections when possible.
Clipping also helps create standard sheet dimensions. The exact dimensions depend on the customer's requirements and the intended application. Decorative veneer may require careful edge trimming to support later matching and splicing.
Quality grading follows inspection. Producers may separate sheets according to color, grain, size, and surface quality. This process helps buyers receive consistent material instead of a random collection of sheets.
Why Veneer Stacks Matter
The order of sheets can become extremely important for decorative applications. Producers often keep related sheets together in veneer stacks. This preserves the sequence created during cutting.
Why bother? Imagine opening a beautiful walnut panel and discovering that the grain suddenly jumps sideways. Nobody wants that surprise.
Keeping sheets in sequence helps manufacturers create matched faces and continuous visual patterns. This practice becomes especially useful for furniture, doors, wall panels, and premium cabinetry.
From Veneer to the Final Product
Veneer for Furniture and Panels
Once producers finish grading, veneer can move into several downstream applications. Manufacturers may bond it to plywood, MDF, fiberboard, or particle boards. The result combines a natural wood surface with a stable engineered core.
This combination offers several advantages. Customers get the look of real wood without using a thick piece of solid timber. Manufacturers can also create large panels with consistent dimensions and attractive surfaces.
Veneer appears in many products, including:
· Cabinet doors
· Furniture panels
· Interior doors
· Wall panels
· Flooring components
· Plywood
· Decorative boards
· Architectural millwork
The veneer becomes the visible face of the product. Meanwhile, the substrate provides structural support and dimensional stability. Together, they create a practical balance between appearance, performance, and material efficiency.
Veneer and Plywood Production
Veneer also plays a major role in plywood manufacturing. Producers arrange multiple veneer sheets in layers and bond them under pressure. They usually alternate grain directions between layers to improve panel strength.
Rotary-cut veneer works particularly well for this application. Its continuous production and wide sheets support high-volume manufacturing. The veneer dryer therefore becomes an important part of the complete plywood production line.
A stable drying stage helps ensure suitable moisture before gluing. That supports better bonding and more reliable panel performance. In short, drying may happen before the exciting pressing stage, but it quietly does much of the heavy lifting.
Why Production Quality Matters
High-quality veneer does not come from one machine alone. It comes from coordination between raw materials, cutting equipment, drying systems, inspection, and storage. Each stage influences the next stage.
We believe the most important factors include:
· Suitable log selection
· Correct conditioning
· Accurate knife adjustment
· Stable veneer thickness
· Controlled drying temperature
· Consistent airflow
· Proper moisture content
· Careful grading
· Correct veneer stacking
· Clean storage conditions
Modern veneer production also aims to reduce waste. Better log positioning and accurate cutting can improve recovery. Efficient drying can reduce unnecessary energy use while protecting product quality.
For us, this is where technology becomes meaningful. A machine should not simply run faster. It should help producers make better veneer with fewer defects and less waste.
Conclusion: From Tree to Thin Sheet
So, how is wood veneer made? The process begins with carefully selected logs and ends with stable, graded veneer sheets. Between those points, producers condition, slice or peel, dry, trim, inspect, and stack the material.
The cutting method determines much of the final grain appearance. The drying process controls stability and moisture content. Finally, careful grading ensures the veneer meets the needs of its next application.
At Shandong Shine Machinery, we understand that drying sits at the heart of this process. Our goal is to help veneer producers achieve stable output, consistent quality, and efficient production. After all, turning a large tree into beautiful thin sheets is already impressive. Doing it efficiently is even better.